Getting started guide
How to start selling feet pics online
Eight steps, in the order that keeps you safe. Each one ends with a short checklist, so you know when it is finished and can move on.

Before you begin
What this guide can and cannot do
It can walk you through a careful setup: the checks to make, the order to do things in and the mistakes that cost new sellers their privacy or their money. Most of the work happens before you take a single photo.
It cannot tell you what you will earn. Some people make regular sales, some make a few, and some make none. Treat it as a small experiment with a clear review date, not as a plan to replace your income.
- Written for adults aged 18 and over.
- No site is recommended, ranked or linked.
- General information, not legal or tax advice.
Step 1 of 8
Make sure you are allowed to do this
Begin with the two questions that can stop everything. Are you 18 or older, or the age of majority where you live if that is higher? And does your country let adults sell this kind of content online? Feet pictures are often not explicit, yet many sites and some laws treat them as adult material anyway.
Give this twenty minutes of reading. Look up the rules on adult content and online selling in your country. If you have a job contract, a visa or a student code of conduct that limits side income, read that too. When the answer is unclear, ask a professional before you upload anything.
Done when
- You are 18 or over and can prove it with a government ID.
- You have read what your local law says about selling adult content.
- Nothing in your job, visa or studies forbids this kind of side income.
Go deeper: Rules and age limits answers
Step 2 of 8
Decide your limits before anyone asks
A line you drew in advance is far easier to hold than one you invent in the middle of a chat. Write down what you will shoot, what you will never shoot, and what you might consider for the right price. Decide whether your face, tattoos or voice will ever appear.
Then decide how much of your week this gets. Pick the days you shoot and the times you answer messages. A plan like that can feel formal for a side project, but it is the thing that stops the project from running you.
Done when
- A written list of yes, no and maybe.
- A decision about your face, tattoos and other identifying marks.
- Set hours for shooting and for answering messages.
Go deeper: Talking to buyers answers
Step 3 of 8
Create a separate seller identity
Your seller self needs its own name and its own inbox. Choose a stage name with no connection to your real name, your nicknames or usernames you have used before, and search for it to check that nobody else is using it. Open a new email address under that name and turn on two-step sign-in.
Use that email for every selling account and for nothing else. Your legal name goes only to the selling site, for the age check and for payouts. Buyers should never come across it in a profile, a message, a file name or a payment receipt.
Done when
- A stage name that leads nowhere when you search for it.
- A new email address with two-step sign-in switched on.
- Location tagging turned off in your camera app.
Go deeper: Staying private answers
Step 4 of 8
Choose one place to sell
You will find general marketplaces, sites built only for feet content, and subscription pages where you bring your own audience. This website does not rank or recommend any of them. What it can do is show you how to judge one yourself.
Open the fee page, the payout page and the content rules of the site, and read all three. Work out what you would receive from one sale after every deduction. Check that the site verifies the age of its sellers, processes payments itself and has a way to reach support. If any of those are missing, keep looking.
Done when
- You can say what the site charges and when it pays.
- You know the smallest amount you can withdraw, and how.
- The site checks age and handles payments itself.
- You have read the content rules from start to finish.
Go deeper: Getting set up answers and Avoiding scams answers
Step 5 of 8
Shoot a first set of ten
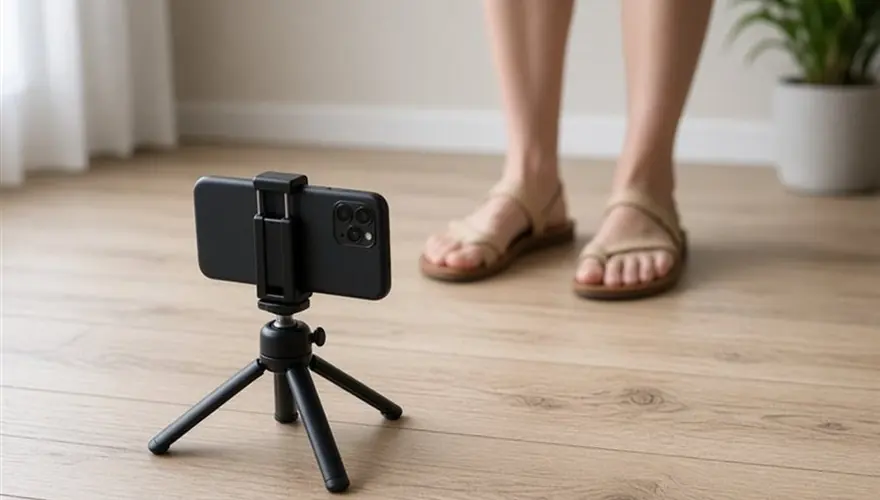
Do not wait for better equipment. Wash and moisturise your feet, tidy your nails and set up beside a window on a bright day. Lay down a plain sheet or use a clean floor. Take many more pictures than you need: tops, soles, arches from the side, toes close up and one relaxed wide shot.
Keep the ten sharpest and edit them lightly, with the same look across the whole set. Before you save the final files, zoom in on each one and hunt for anything that could identify you, such as a reflection, a letter on a table, the view from a window or a tattoo you forgot about.
Done when
- Ten sharp, evenly lit photos in one style.
- Every frame checked at full size for identifying details.
- Original files kept, with edited copies saved separately.
Go deeper: Taking photos answers
Step 6 of 8
Write your profile and set prices
A profile has one job, which is to tell a buyer what you offer and how to order it. Use your stage name, describe the kind of sets you make and state your limits in a sentence. Add two or three watermarked previews that show the quality without giving the set away.
For prices, look at sellers with a similar style on the same site and start a little below the middle. Remember the cut the site takes. Settle now on what a custom request costs and how long it takes, so you are not inventing numbers when the first one arrives.
Done when
- A short bio with your stage name, what you offer and your limits.
- Two or three watermarked preview images.
- A price for sets, plus a price and delivery time for custom work.
Go deeper: Pricing and getting paid answers
Step 7 of 8
Handle the first messages and orders
Early messages are a mix of real buyers, people hoping for free pictures and the occasional scam. Reply politely, keep it short and point to your prices. Turn down free samples. Never agree to pay a fee, accept a cheque or a gift card, or carry on the chat in another app.
When an order arrives, confirm the details, wait until the payment shows as completed on the site, and then deliver exactly what was agreed. Thank the buyer. If a chat turns rude or strange, end it and use the block and report buttons. Nobody is owed a second chance.
Done when
- Saved replies for prices, custom work and free sample requests.
- You deliver only after the site confirms the payment.
- You know where the block and report buttons are.
Go deeper: Talking to buyers answers and Avoiding scams answers
Step 8 of 8
Keep records and review after eight weeks
From the first sale, note the date, the amount, the fees taken and what you sold. A basic spreadsheet is enough. In most countries this income is taxable, and tidy records turn a stressful task into a short one. They also show you which sets people really buy.
Put a date in your calendar about eight weeks after your first listing. On that day, look at the numbers honestly. If things are moving, make more of what sold. If nothing has happened, change the photos, the prices or the site. And if you find you do not enjoy it, stopping is a perfectly good result.
Done when
- A spreadsheet with dates, amounts, fees and costs.
- You know how side income is reported where you live.
- A review date in your calendar.
Go deeper: Growing repeat buyers answers and Pricing and getting paid answers
Stuck on one of the steps?
Look for the exact question in the answer library. If it is not there, write to us and say which step tripped you up.